here: – mollwollfumble’s science
Some old, some new, some might work, some just plain weird.

here: – mollwollfumble’s science
Some old, some new, some might work, some just plain weird.
For some reason best known to Microsoft, the Excel documentation does not include a graphic list of shapes with an example of each shape, and the text list they do provide is incomplete.
The file shapelist.zip
rectifies that omission with an automatically generated table of shapes from number 1 through to 183.

It also includes examples of how arcs (shape no. 25) work in Excel 2007 and earlier versions.

The size and position of arcs are defined with the usual width, height, left, and top properties, but note that the width and height are equal to the arc radius, and the left coordinate is equal to the X value of the arc centre. The start and end points of the arc are defined with Adjustment(1) and Adjustment(2), and the shape thus defined may be rotated with the Rotation property. Unfortunately there are significant differences in the way in which these properties are applied in Excel 2007 and earlier versions.
Assuming an XY coordinate system, with origin at the centre of the arc:
Adjustment(1) defines the angle of the start of the arc, measured from the X axis. In Excel 2007 clockwise angles are positive, in earlier versions anti-clockwise is positive.
In both versions an Adjustment(1) value of zero defaults to a starting point on the Y axis, i.e. to -90 degrees in Excel 2007 and 90 degrees in earlier versions.
Adjustment(2) defines the angle of the end of the arc, measured from the X axis, with the same sign convention as adjustment(1). An adjustment(2) value of zero defines an end point on the X axis, as would be expected, zero values for both adjustments therefore defines an arc between the Y and X axes.
The rotate property rotates the defined shape, with a clockwise rotation being positive in all Excel versions.
In Excel 2007 the shape is rotated about the origin, i.e. the centre of curvature of the arc. In earlier versions the rotation appears to be about the mid-point of a radial line to the centre of the arc.
For compatibility between versions it seems best to avoid using the Rotation property, and adjust the sign of the adjustment angles according to the version number.
Code to generate an arc and a circle, using values specified in a spreadsheet range, is shown below. The code checks for the Excel version, and for versions earlier than 2007 (version 12.0) reverses the sign of the arc adjustments, so that the arcs drawn are consistent across versions.
Sub Drawshape()
Dim shapeA As Variant, sType As MsoAutoShapeType, sLeft As Single, s_Top As Single, sWidth As Single
Dim sHeight As Single, sRotn As Single, sAdj1 As Single, sAdj2 As Single
Dim shp As Shape, i As Long
For Each shp In ActiveSheet.Shapes
shp.Delete
Next shp
shapeA = Range("shapetab").Value2
i = 1
Do While shapeA(1, i) <> 0
sType = shapeA(1, i)
sLeft = shapeA(2, i)
s_Top = shapeA(3, i)
sWidth = shapeA(4, i)
sHeight = shapeA(5, i)
sRotn = shapeA(6, i)
sAdj1 = shapeA(7, i)
sAdj2 = shapeA(8, i)
If Application.Version < 12 Then
sAdj1 = -sAdj1
sAdj2 = -sAdj2
End If
With ActiveSheet.Shapes
Set shp = .AddShape(sType, sLeft, s_Top, sWidth, sHeight)
End With
With shp
.Rotation = sRotn
If sAdj1 <> 0 Then .Adjustments(1) = sAdj1
If sAdj1 <> 0 Then .Adjustments(2) = sAdj2
.Fill.Visible = msoFalse
End With
i = i + 1
Loop
End Sub
An example of the shapes generated by this code is shown below:

Note that “Width” and “Height” values of the circle are double that of the arc, and the “Left” value of the circle is 105 less than that of the arc.
Use of the “rotation” property in Excel 2007 and earlier versions is illustrated below:


Note that the input for these two screen shots was identical.
There has been a problem with the web site where I host my files for downloading, with the result that any links for file download will not have been working.
I have copied all the linked files to:
New file location
I have edited most of the recent links, but if you find one that doesn’t work, try the link above.
If you still have problems, please leave a comment below.
Update 28 July 2008: The file link has now been transferred to a new server, with the old domain name: New new file location
Please leave a comment if you have any problems
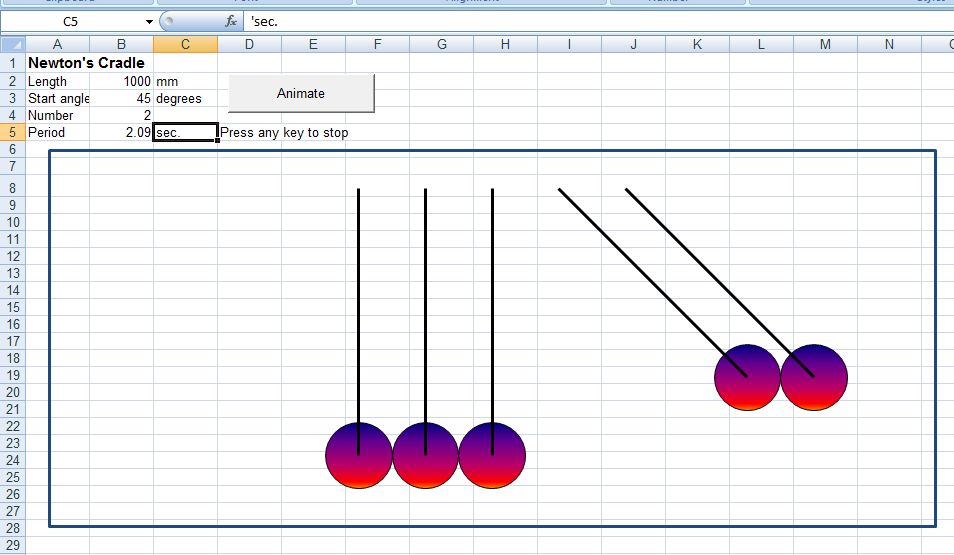
I have added a Newton’s Cradle animation to the animation file posted previously:

The animation finds the correct period for the input string length and starting angle, and displays the movement of the balls in real time.
This post will look in a bit more detail at the methods presented in the previous post. It would be a good idea to open the previous post on another tab, or download the example file and open the code in the Visual Basic editor.
For each of the shapes in the example code the shape was added to the “shape collection” (and hence displayed on the active worksheet) with a command of the form, either:
set VariableName = ActiveSheet.Shapes.addShape(parameters)
or
with ActiveSheet.Shapes.addShape(parameters)
.property = PropertySetting
end with
or the similar:
ActiveSheet.Shapes.addShape(parameters).property = PropertySetting
For two of the methods used in the example (AddCurve and AddPolyLine) a different form is allowed; e.g.:
ActiveSheet.Shapes.AddCurve (PointArray)
will add the curve specified by PointArray to the shapes collection. Note the space between AddCurve and the parameters. The editor will add the space if necessary for those methods where this form is acceptable, otherwise it will tell you that it is expecting a “=”, and one of the forms described earlier must be used.
I have no idea what is the logic (or if there is any logic) behind the way the different methods are handled, but it seems to me best to stick with command forms that will work for all the shape methods.
It can be seen that there are a variety of methods to create simple shapes, for instance a straight line can be created using:
AddLine
AddPolyline (with one segment)
AddShape
ConverttoShape
or even AddCurve
Similarly the dodecahedron can be created with AddPolyline, ConverttoShape or AddShape, but using AddCurve with the same coordinates produces a different shape.
In general I will be using AddLine or AddPolyLine in most cases, with AddShape being used for arcs and circles (or ellipses) or if a regular polygon is required.
The final point concerns the naming of shapes. Each of the shapes except the dodoecahedron created with the AddPolyline method have been given a name at the time of their creation. Shapes not explicitly named are given a name consisting of a description followed by a sequence number, such as FreeForm44. Since the sequence number will increment as shapes are created and deleted it is impossible to know what any given shapes allocated name will be, so if you will need to select a shape using VBA code at any time the shape should be named explicitly at the time of its creation.
